home contact about wee before & after things to come wanna be featured? advertise
Showing posts with label Pumpkins. Show all posts

Thursday, October 27, 2011

Toasted Pumpkin Seeds {6 Wicked Days of Halloween}


If you are here from the 6 Wicked Days of Halloween,
Welcome! 

    
I am day 3 of the 6 day crawl, I dont have anything gory or creepy, but thought 
I would share a recipe for toasted pumpkin seeds, ANOTHER thing to love about this holiday! 
I know alot of people just throw the seeds away with the 'guts', but
I highly recommend giving one of these quick and easy recipes a try!

First you need to retrieve the seeds,
                              

this year my kids came up with their own designs. With no help from us.


Shocking that Wyatt was willing to get his hands all slimy. 


Morgan however had no issues with the pulp.

Ok, on to the recipes.
I am going to share 2 different seasonings you can choose, salty or sweet.
Rinse the seeds and remove as much of the pulp as possible.
NEVER place cleaned seeds on a paper towel, they will stick. I found out the hard way one year.


You will need spray oil (I use Olive oil), sea salt (or kosher salt), 
I find that the larger grannuals stick better), and brown sugar.


I have always baked my seeds, but I thought I would try it and see if I had another 
option that didn't set off the smoke alarm was quicker. So I toasted them. Spray the seeds with the oil and toast in frying pan until browned. Usually takes about 20-30 min on medium/low to toast them. Then sprinkle them with the Sea Salt, stirring constantly. When they pop a little in the pan, they should be done. Taste one when cool and if they are crunchy-ENJOY.


The sweet recipe is the same except the last few minutes of cooking, add a few tablespoons 
of brown sugar. Stir constantly until the sugar melts & let cool.


I have enjoyed them since I was a kid, hope you and your family enjoy them too!
Now get scoopin and toastin!!


Here are my kids spooky Jack-O-Lanterns, I love how they are so not perfect, but perfect for them!!


and don't forget to check in on our Creepy Crawl here:

25th - Marilyn @ The Artsy Girl Connection
                                            26th - Jessica @ Hill Country Homebody
27th - Bonnie @ a wee Meenit

28th - Rachel @ The Crinkled home

29th - Laura @ Ms Smarty Pants
30th- Project PINK!!
                                                               31st - Jenna @ 2027


Linking to:


Wednesday, October 5, 2011

Pumpkins past and present


I love the fall and my favorite Holiday just may be Halloween. Wait, is it a holiday?? Not sure, but anyway, I love pumpkins! All kinds of them real or faux!
Here are some new ones I have just finished as well as another peak at some I have already shown you. Hope you enjoy...

I have had this photo for a few years now. I LOOOVE it!


(BHG)
It is my inspiration for the first pumpkin to show you.


Here is my pumpkin. I decided to do a small faux one, not knowing how labor intensive this 
would be. Glad I was not too ambitious!


I tried to figure out what would be comparable to upholstery tacks. I bought some 'brads' (what a weird name for them). but thought it might be too hard with the tail being so long. I went to a few hobby stores and settled on some rivets I found in the leather working area. They come in 2 sizes and each had 2 pieces too it. I assume, you would put one on a different piece of material and snap together. I bought a small and medium size bag, for about $3.89 each.


I painted every single one of them with acrylic craft paint and let dry over night. I chose a simple stencil and a small faux pumpkin. This project was very inexpensive, but time consuming and it KILLED my thumb!! I used the new Martha Stewart spray adhesive to keep my stencil on straight. I took a long nail and punctured where I wanted the rivet to go, then pushed it into the pumpkin. 


14 hours One hour later I was done. I had to touch up some of the rivets with the black paint, the stencil had actually touched a few of the rivets and pulled the paint off, but no worries! I then took it out back and sprayed it with a very high gloss clear spray paint. Let it dry over night and voila!! If you want to attempt this, I would seriously consider either black flat push pins or bulk upholstery tacks you can find from 
an upholstery supply store. DIY Upholstery Supply online is pretty good.


Next up is my favorite, the Chalk Paint pumpkins!
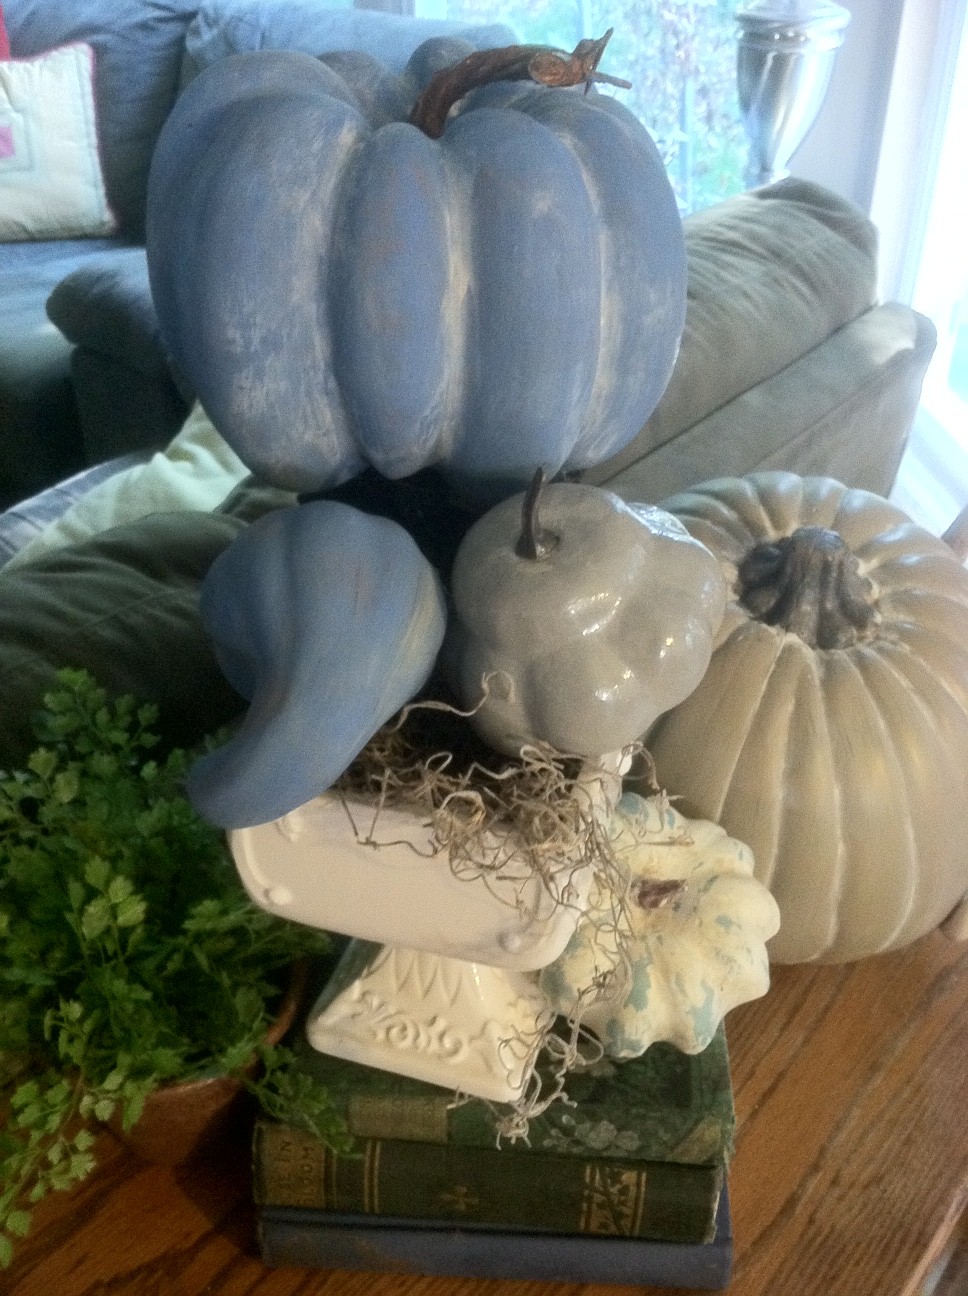
I did a post a few weeks ago about how to paint pumpkins with Annie Sloan Chalk Paint.
 You can see that post here.


Love the Greek Blue with a wash of Old White!


Here are my Metallic Jade pumpkins you can see the post on those here.


I just finished a few silver pumpkins. I used Krylon Foil Metallic spray. I think I am going to repaint my Thrift store lamps I put in my bedroom, this is so shiny, it really looks like a nickle finish!


I am going to try to get a Mercury glass finish with this spray paint also!!


I also did a turquoise pumpkin. I mixed some metallic green craft paint with a little bit of ASCP duck 
egg blue and painted over one of the silver pumpkins, then distressed it a little.


I do have real pumpkins too! (OK the orange one is real, white is not!) LOL


Here is my front porch with some Heirloom
pumpkins I got at the Farmers Market. My favorite is the top one on the chair, it is such a pretty butter color!! The other thing I like as much as my pumpkins are roasted pumpkin seeds! But those will have to wait until closer the Halloween. Hope you enjoy my pumpkins!!


Linking to:
lil luna pumpkin button

   Bella Before and AfterConfessions of a SAHMPhotobucket

Saturday, October 1, 2011

Fall Mantle and Front Porch


I decorated my mantle and built ins last weekend, after I painted the backs 
of the built ins. I was inspired by so many 'unpredictable' fall decorated mantles, 
I wanted to do my mantle over.
I just had to do it. Mr. hasn't noticed yet, he already 
thinks I am nuts, so who cares!
:o)


I did it a couple times, not sure which one I liked. I started with some of my ironstone pottery collection.


I wanted a more, white, Greek blue (pumpkins) and a touch of green.
I just kept moving stuff, taking away then adding back. 


I love my shed antlers, and the grasses are from my landscaping.


I pulled out a white platter I use at Thanksgiving, it is covered in leaves.


I think I like this one the best. I put just a few sprigs of greenery in and took out the platter.


Is it better? I think so!


I also did my front porch. I have a local farmers market I go to weekly & got ALL these 
pumpkins for $20!


They even had an amazing price of $3.99 on the fall mums. 
The Boston Fern was $14 & it is HUGE!


My kids wanted to decorate the front door. Isn't it PRETTY??? :o)


Just for a few minutes my Wyatt stopped moving long enough to fall asleep 
on me.That is my favorite and I do not get that any 
more having no babies! 
My kids are off to the grandparents for the weekend, 
so lets see what I can get done while they are away!!!

linking to:
Capture

Monday, September 19, 2011

Chalk Paint Pumpkins!

The fall is my favorite time of the year!
Nothing beats the changing color of the leaves, cooler temps, the need for a jacket in the evening. I would live in a climate like this all year round!
I also love to decorate for fall. I figured I better get started before I had to add the Halloween decorations that I love too, but that is just not as pretty as just fall!


So here are a few things I did (with my super awesome, 6 year old helper girl!) ;0P


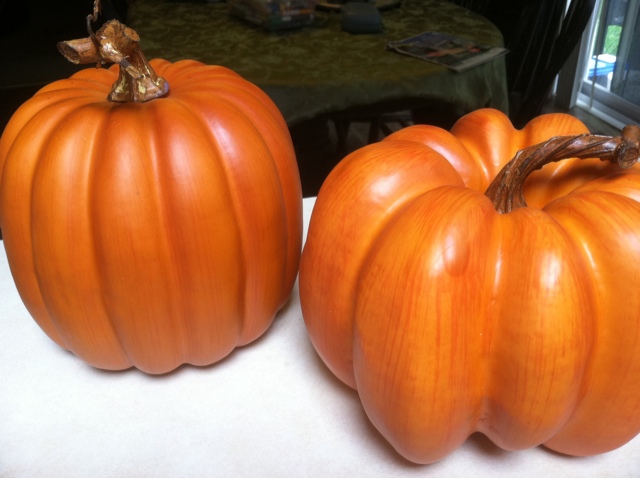
I just got back from an Annie Sloan Chalk paint workshop & was excited to see what I could do to the finish on faux pumpkins. I did a few in Greek Blue (LOVE that color, I see a table in my future in GB). I started with an assortment of faux pumpkins, mostly orange. I love the shape of these two, got them from local craft store (they are all running together so I don't know which store), they are not your standard 'round' faux pumpkin.


I only did one coat as I knew I would be doing a wash on it with Old White: after completely dry I added a bit of water to Old White & brushed it on over my kitchen sink, while wiping away what I wanted to with a damp paper towel. When it gets too full of paint to wipe away, just rinse it out & use it some more. I found it easier to break it up into a few sections and that way I didn't have to work so fast.


The picture frame in the photo above I finished in the workshop
& as soon as I get a new hard drive for my laptop ( back it up people!!!) I will do a post about that.


I also did a taupe pumpkin using an oops paint tester from Home Depot, it was only $.50! I did the same Old White wash over it & I love this one too!

I painted another small one Paris Gray but no wash on it but did use some of the high gloss spray paint from Deco. It is in a photo below with all the other pumpkins.


Lastly I did a cute little pumpkin that started out white & covered it with Provence. After it dried completely I painted thick & thin spots on top with Old White.


I hit it with a hair dryer so the thinner spots would be dry but the thicker spots not.
I then took a damp paper towel & started to rub off the thick areas.


I then took a sanding block & distressed the pumpkin!! The last step I glazed it with a wash of Old Ochre but no high gloss spray as I liked the matte finish on the ASCP pumpkins!


The Metallic pumpkins on the bottom shelf are a knock off of pumpkins I saw & loved at Hobby Lobby and can be seen here.


what do you think, did I make them look better than the craft store orange faux??


Linking to:


lil luna link party buttonDomestically SpeakingPhotobucketThe Lettered CottageDomestically Speaking UndertheTableandDreaming  Everything Under the Moon Fall_Link_Party_Kate ThriftyThurs Thrifty Thursday Week 43  Photobucket Confessions of a SAHM


Featured at:
 UndertheTableandDreaming

LinkWithin

Related Posts Plugin for WordPress, Blogger...